| Info |
|---|
| Operations such as editing, adding and modifying are the same as for steps in Test Case Template. To learn more, see Steps Design. |
Execute test steps
The Steps panel on Test Case differs from the panel displayed on the Test Case Template in that it . It has an additional column in which you can mark the status of a given step. The status statuses displayed in this column is the default, you can set it in are default. To set own configuration of Statuses go to the project configuration in the General tab. 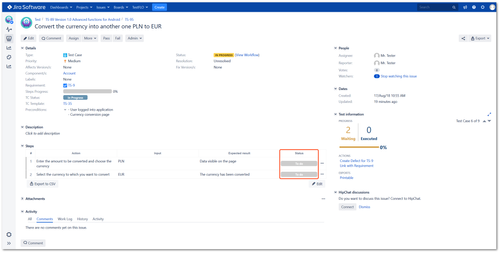
- Steps statuses execution
1a. To change step status, hover over the status in the appropriate step and click on the one that indicates the step execution.
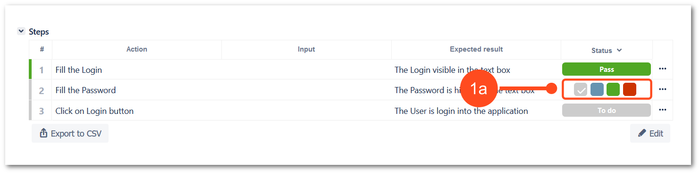 Image Added Image Added
1b. To bulk change all statuses you can use the Status button. Click on the Status and choose appriopriate execution status.
 Image Added Image Added
1c. If the steps are divided into groups, you can change the status for a single step or use the Change option and change the status of the whole group of steps.
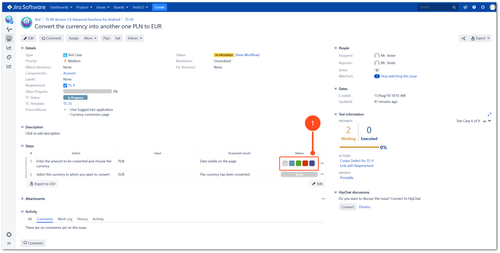 Image Removed Image Removed
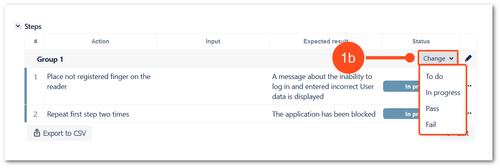 Image Removed Image Removed
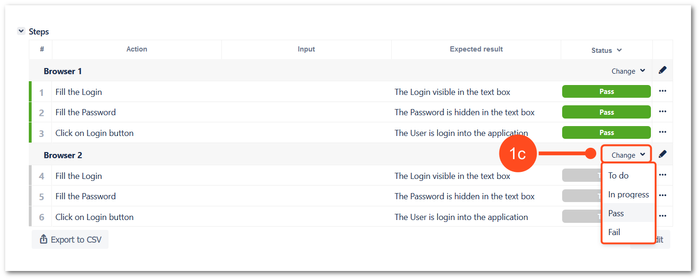 Image Added Image Added
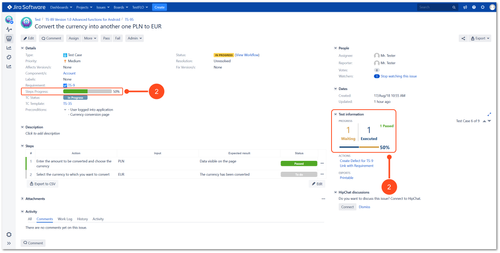
- If the selected status is the final status (see Steps Statuses option in General tab to configure) the progress will be shown in the Test information panel and Steps progress field as executed.
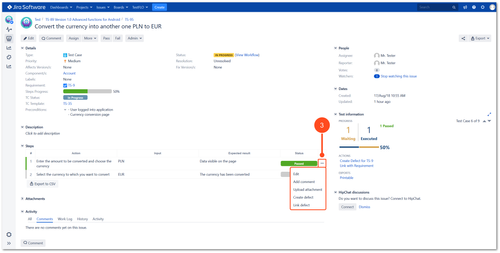
Each step contains operations under one button. With its help it is possible to: - Edit given step
- Add comment
- upload attachment
- create defect
- link defect
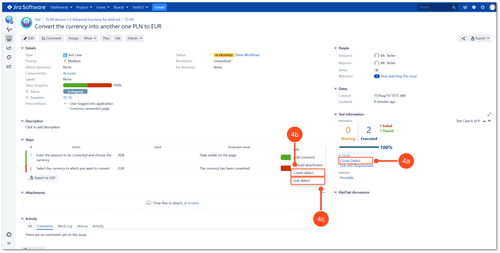
If the step is marked as fail you can report the defect in two ways:
4a. Create Defect on Test Case using Create Defect operation
4b. Create defect on a particular step. To be able to present a defect in an easier way, you can add a file or a comment. The issue key of created defect will be visible on Defects section on a step.
4c. It is also possible to link existing defect to particular step | Info |
|---|
| Each of the create defect operation will take you to the defect creation window. If a specific issue type was selected in the Defects tab in the project configuration, it will be automatically inserted as the issue type. |
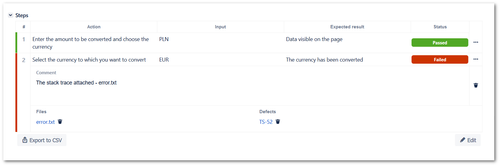
If you want to delete an attachment, comment or linked defect use the bin icon.
|